
If you want to start making your own skincare, but you’re overwhelmed by all the ingredients the internet says you need… I get it.
When I started making fifteen years ago I spent a fortune on “must have” ingredients, but once they showed up it turned out that most of those ingredients were either so specialized I never finished them, or super similar to things I already had. It was like I’d bought ground cloves, half a dozen croissants, and seven different brands of canned tomatoes. AGH.
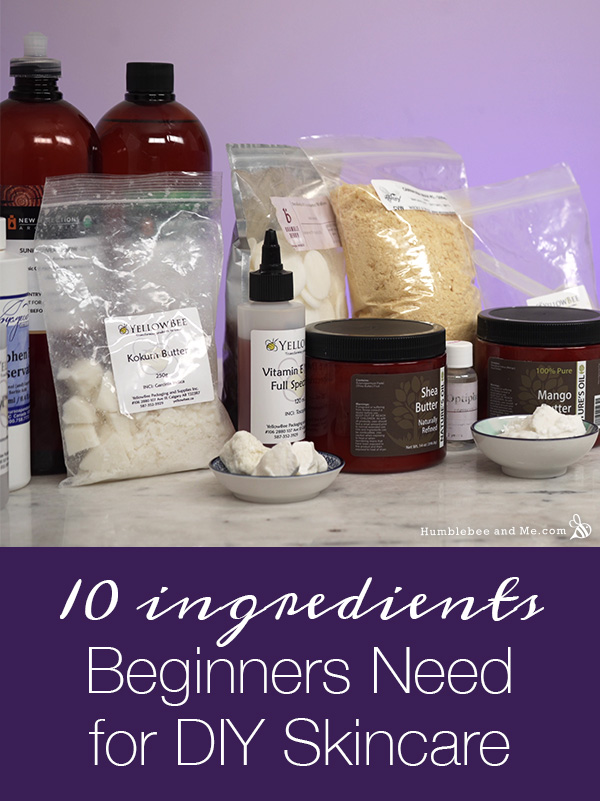
In the years since I’ve learned which ingredients actually get used over and over again, and which ones just don’t make sense when you’re a new maker—and I’ve compiled those into my list of ten must-have ingredients. With these, you can start creating your very own balms, butters, salves, lotions, and more!
Carrier oil
When you first start out, you’ll probably be making lots of water-free formulations like lip balms, lotion bars, and body butters. The recipes you’ll find will probably all include a liquid oil—but of course not the same ones, because that would be too easy!
Instead of buying all of them (which adds up fast!), start with one or two inexpensive, lightweight liquid oils.

My top recommendations are sunflower, safflower, or grapeseed oil as they’re all high in linoleic acid, which has been shown to be beneficial to our skin’s natural barrier.
If you want to get a second oil, you might try one that’s higher in oleic acid, like sweet almond or apricot kernel oil.
These oils will work well in place of many liquid carrier oils called for in basic skincare DIYs. You certainly can branch out and try fancier carrier oils, of course, but one or two versatile ones will get you started without spending a fortune.
Want to watch this project instead of read it?
Soft butter
The second ingredient you should have in your DIY pantry will be super useful for making all sorts of body butters and balms: a soft, creamy butter.

Shea butter is usually the go-to option as it’s easy to get and relatively inexpensive. You can buy refined or unrefined/raw shea butter. Both are lovely, but raw shea butter has a very distinct smokey, nutty smell that will come through in your products if you use much of it. For this reason, I generally recommend starting with refined & deodorized shea butter simply because it’s much more versatile.
If you prefer lighter skincare, mango butter is a great alternative to shea butter. It’s similarly soft and creamy, but feels far less greasy on the skin.
Brittle butter
Our third ingredient can seem like the sort of thing you could easily just use more shea butter for—but it’s not.

I really recommend all makers get some sort of brittle butter when they start making. Where soft butters are creamy and spreadable, brittle butters are hard, and snap or crumble rather than mash. They don’t necessarily have a higher melting point than soft butters; they just have different fatty acid compositions.
This firm consistency makes brittle butters excellent ingredients in body butter bars and balms, where they can make a bar solid and firm but still melt at body temperature.
My favourite brittle butter is cocoa butter, but it has become really expensive in the last couple years due to poor cocoa crops. If you can get kokum butter or tucuma butter, those can be good alternatives.
If a brittle butter is out of reach, that’s ok—you can still make plenty of lovely things without one in your pantry! Just remember that soft butters like shea aren’t a good alternative in formulations that rely on firm, snap-able cocoa butter for structure.
Wax
Of course, a brittle butter is far from the only (or easiest) way to make your DIYs harder.

For that job, a good wax is hard to beat! Waxes harden and thicken our creations at low levels, so unlike a brittle butter, they don’t need to be the star of your formulation to make a big difference.
Beeswax is definitely the standard here, and for good reason. Its creamy, rich feel creates beautiful lip balms, salves, and bars, and it’s the one ingredient almost anyone can source local-ish-ly.
If you don’t want to use animal products in your DIYs there are lots of vegan wax options, but none of them perform identically to beeswax. This means a 1-for-1 swap is never going to give you exactly the same result.
The “C” waxes—candelilla and carnauba—are usually easy to get, but much harder than beeswax and nowhere near as creamy. Sunflower wax can be a good option if you can buy it. I also really like bayberry wax; it’s creamy like beeswax, but softer.
Learn more about the different waxes we use in DIY skincare
- A Quick Guide to Beeswax & Liquid Oil Ratios
- A Quick Guide to Carnauba Wax & Liquid Oil Ratios
- A Quick Guide to Candelilla Wax & Liquid Oil Ratios
- A Quick Guide to Sunflower Wax and Liquid Oil Ratios
- A Quick Guide to Berry Wax and Liquid Oil Ratios
- A Quick Guide to Bayberry Wax & Liquid Oil Ratios
Fatty thickener
If you’ve been making for a little while there’s a decent chance you’ve already got the four ingredients I’ve so far—but you probably don’t have this fifth one yet!
This ingredient gives us potent thickening power—like a wax—but without waxiness, which we don’t always want. It’s also a much cheaper way to get the sort of firmness lots of cocoa butter can bring to a DIY.

I know fatty thickeners sound quite boring compared to the romance of a butter or oil, but they’re inexpensive, have very long shelf lives, and are REALLY versatile. I wish I’d started using these ingredients earlier, and I want to save you that pain.
You’ve got several options:
- Stearic acid is an isolated fatty acid. It is found in high concentrations in butters like cocoa and shea, and it thickens and hardens your creations in a really buttery way, adding richness and creaminess.
- Cetyl alcohol is a lightweight fatty alcohol that has the most amazing expensive, slippy skin feel.
- Cetearyl alcohol falls between the two: creamier than cetyl alcohol, but more slippy than stearic acid.
If you can only get one, I recommend cetearyl alcohol. If you can get two: cetyl alcohol and stearic acid. And of course, if you can get all three, that’s even better!
Learn more about how different fatty thickeners impact our DIYs
- A Quick Guide to Stearic Acid & Liquid Oil Ratios
- A Quick Guide to Cetyl Alcohol & Liquid Oil Ratios
- A Quick Guide to Cetearyl Alcohol & Liquid Oil Ratios
- A Quick Guide to Butter Pearls and Liquid Oil Ratios
Antioxidant
Now that we’ve got a lovely suite of oils and butters, we need something in our pantry to protect the creations we make with them. Oils and butters can’t grow mould because they don’t contain any water, but they can go rancid—also known as oxidizing. This is a natural and unavoidable process that happens when fats are exposed to oxygen.

An ANTI-oxidant will help slow this down—ideally so much that you finish your product before it starts smelling funny. I recommend vitamin E MT-50 (also known as tocopherol) for this job. “MT” stands for “mixed tocopherols”; it’s a blend of different vitamin E isomers and will both protect your formulation from rancidity and add antioxidant skincare benefits to your DIYs.
Vitamin E can be tempting to buy at the pharmacy, either as a supplement or in liquid format, but those aren’t what we want. Dietary supplements usually contain other ingredients, like gelatin and glycerin; the oils are not concentrated enough; there’s a good chance it’ll be the wrong type of vitamin E; and neither are formulated to prevent rancidity in skincare products. So, make sure you buy this ingredient from a DIY supplier.
Want to watch this project instead of read it?
Emulsifying wax
With our seventh ingredient we open up some exciting new possibilities! Emulsifying waxes make two ingredients that usually want nothing to do with each other—oil and water—play nicely.

They’re also a very misunderstood ingredient. There is no one “emulsifying wax”; this is a category of ingredient, and there are lots of different of emulsifying waxes. They all do similar jobs, but they aren’t completely interchangeable.
Think of them like wheat flour. All purpose, whole wheat, pastry, bread, and tipo 00 are all flours made from wheat, but each is different enough that it matters. If you used whole wheat flour instead of pastry flour when baking angel food cake, you’d definitely notice.
What you want when you start out is the emulsifying wax equivalent of “all purpose flour”: something that’ll work well in lots of formulations.
Emulsifying Wax NF (INCI: Cetearyl alcohol, Polysorbate 60) is pretty widely available, inexpensive, and very versatile.
For a natural option, Olivem© 1000 (INCI: Cetearyl Olivate, Sorbitan Olivate) is a good choice.
Even more emulsifying waxes
-
- Ritamulse SCG (INCI: Glyceryl Stearate, Cetearyl Alcohol, Sodium Stearoyl Lactylate)
- BTMS-25 (INCI: Cetearyl Alcohol, Behentrimonium Methosulfate)
- BTMS-50 (INCI: Behentrimonium Methosulfate, Cetyl Alcohol, Butylene Glycol)
- Montanov™ 68 MB (INCI: Cetearyl Alcohol, Cetearyl Glucoside)
- Montanov™ 82 (INCI: Cetearyl Alcohol, Coco-Glucoside)
Distilled water + preservative
Ingredients eight and nine are a pair because once you’ve got eight, you need nine. Once you’ve got these two ingredients you can start making lotions, creams, and emulsified body butters!
We use distilled water in our DIYs rather than tap or mineral water because it’s just water. Distillation removes the minerals and ions that are present in tap and bottled water that are perfectly safe to drink, but can really throw a wrench in our formulations. You can also use de-ionized or reverse osmosis water, but I’ve found distilled water is the easiest to get—I can buy 4L at the grocery store for about $2.
The preservative part of this pair is a bit more tricky.
Adding water to our formulations turns them into delicious buffets for all sorts of microbes, so where water goes, a broad-spectrum preservative must go as well so our cosmetics don’t turn into fuzzy, mold-infested disasters.

Cosmetic preservation is a big topic where the answer to most questions ends up being “it depends”. When you first start making, I recommend purchasing a broad spectrum synthetic preservative because those are the easiest to use; natural preservatives definitely can work, but they tend to require things that can be intimidating to newer makers, like preservative boosters and pH testing and adjusting. So, to keep things simple, start synthetic.
My go-to recommendation for years has been Liquid Germall™ Plus; it’s super effective, not picky about pH, and is fully water soluble, so it works well in all sorts of formulations. Recent regulatory changes in the states of Washington and California mean Liquid Germall™ Plus is becoming harder to find, though, complicating our formulating decisions.
I’d say your next best option is a phenoxyethanol-based preservative, like Optiphen™, Optiphen™ Plus, or Euxyl® PE 9010. These are all good options, but they aren’t all as water soluble as Liquid Germall™ Plus. This means you may need to make some adjustments to use it in watery formulations like room sprays or hyaluronic acid serums.
Humectant
You’ll use a humectant in everything from lotions to creams to serums, where it will help hydrate your skin, improve barrier health, keep your products from drying out, and even boost preservative performance.

Vegetable glycerin is definitely the easiest and cheapest option; if this will be your first humectant, start with glycerin.
You can buy this one at the pharmacy if you want to—USP glycerin is held to strict standards, so it doesn’t matter where you get it from a purity point of view.
There are lots of other options, too, like:
- Propanediol 1,3
- Sodium lactate
- Butylene glycol
- Propylene glycol
- Sorbitol
And that’s it—ten super versatile, inexpensive, easy-to-get ingredients that you can use to make all sorts of skincare goodies.
Think I missed something? Let me know in the comments below!
